Every good project starts with a trusty sketchbook, #2B pencil, eraser, and I mind full of ideas. I spend LOTS of time creating invitations for work. And the typefaces available to designers these days are amazing—they can often times achieve a hand-lettered look seemlessly. They are a great resource, but, every now and again I want to create something that just can't be done with one of those fonts, so I get the opportunity to hand-letter! I'm always super excited for this, and the world of possibility is wide open.
Because I create designs that are for sale online and need to be personalized from client to client, I have to do a combo design, which means hand-lettered portions that will work well with the typefaces the customer will be using. It's not always easy to bring the two together given the variables of name, size, venue information and such, but if I can pull it off, it's usually pretty cool.
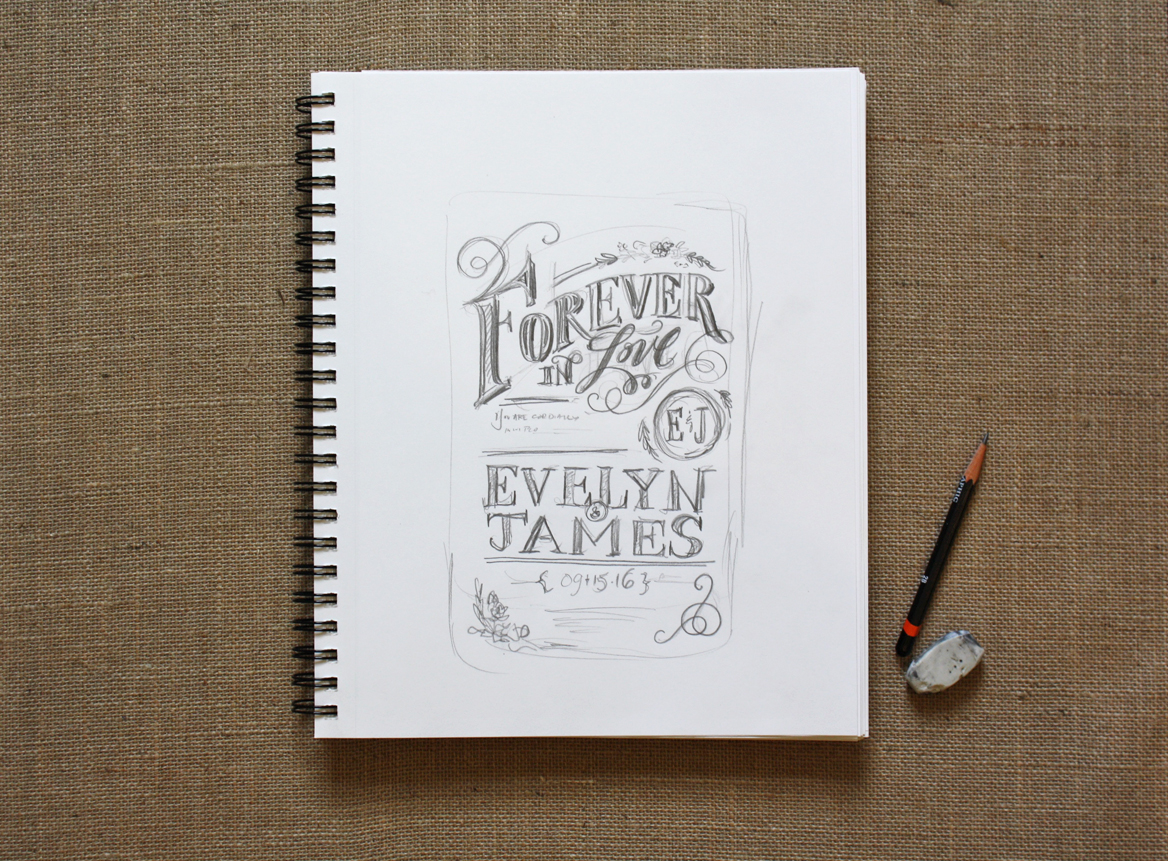
I still start a project the way I did back in college. Some things never change. Paper and pencil are the perfect medium to get the create process going. I don't make perfect sketches, I more or less just try to get the quick vision I have in my brain down on paper.

Once that's done and I think the concept has promise, I move to the next step, which is transitioning that sketch to a solid drawing on quality paper. I use a smooth Bristol that will receive a micron pen well. I lightly draw the entire illustrated and lettered portion of the design in pencil, making all my corrections and tweaks along the way. Once that's done I add a medium level of detail, not full detail, just enough to get a sense of the best treatment of each piece of the design.
After that drawing is done, the real challenge comes, and that's going over that drawing with ink. I love my both my micron and prismacolor premier pens, and typically work with a .01 to .05 size, depending on what piece of the illustration I'm working on. This is the time to embrace "whatever happens will happen" and make it work. There is no turning back with ink ( at least before it gets digitized, but the less I need to do there, the better). Every single thing I create usually has a mistake but the trick is to somehow make it disappear and that is a skill I'm always perfecting.


After I've drawn it all out, I gently erase the under drawing and then it's ready to be scanned in and turn into a digital illustration. This is where the whole piece comes together and the typography and illustration combine to create the final piece, ready to be customized for the clients needs. You can see there were slight changes from the finished illustration, to the look of the actual invite. Things don't always translate the way you'd like once it's on the computer. I had this vision of a beautiful cap to start the copy beneath "Forever in Love." It was a nice idea, but didn't make the cut. The end piece is always an evolution and in this case, I think it worked well!


I created two short high-speed videos of the pencil under-drawing and ink application which are kind of fun, check them outhere!